Deluxe Cleco Fastener Kit - 80 Pins (3/32″, 1/8″, 5/32″, 3/16″), 6 Copper Clamps (1/2″ & 1″) & Pliers
Deluxe Cleco Fastener Kit - 80 Pins (3/32″, 1/8″, 5/32″, 3/16″), 6 Copper Clamps (1/2″ & 1″) & Pliers
Delivery Options
See AllOrder before 3pm AEST & have it dispatched today.
Dates provided are estimates to major cities & not guarantees*
We do not store or have access to your credit card details.
Delivery Estimates
Orders placed by 3pm AEST Monday–Friday ship the same day. Weekend orders ship Monday. Freight costs are calculated at checkout.


Express Post typically arrives next business day in major Australian cities for orders placed before our cut-off.
Not available for orders including aerosols or DG’s.

- Delivery dates are estimates, not guarantees.
- Bulky items may be shipped via TNT Road express.
- See our full shipping policy here.
Key Features
Kit Includes:
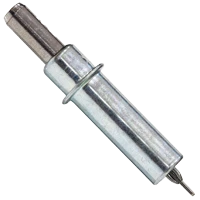
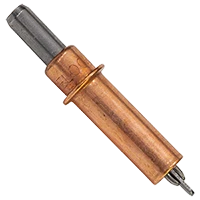
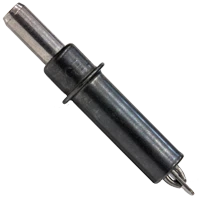
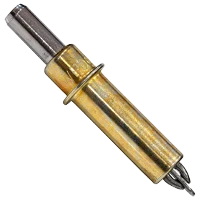
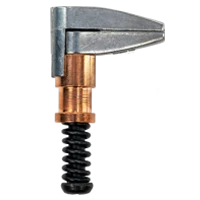
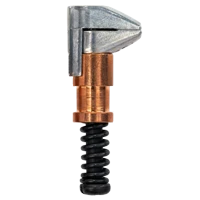
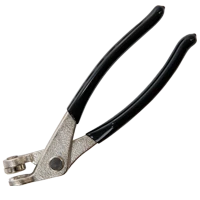
Cleco Pin Sizes (General Guide)
Cleco fastener pins are available in four sizes, each identified by a unique colour code. The size corresponds to the hole diameter they fit.
 | Colour | Hole Size | Part No. | Link |
|---|---|---|---|---|
 | Zinc | 3/32″ | AT551M | View Product |
 | Copper | 1/8″ | AT552M | View Product |
 | Black | 5/32″ | AT553M | View Product |
 | Brass | 3/16″ | AT554M | View Product |
 | Activate using Cleco Pliers which work with all sizes of pins & side grip clamps. | View Product | ||
 | Activate using Cleco Pliers which work with all sizes of pins & side grip clamps. | View Product | ||
This guide shows all our available pin sizes. Check the kit details for what’s included.
Cleco Side Grip Clamps (General Guide)
Side grip clamps come in copper (1/2" max opening) and brass (3/4" max opening). Each is available in a 1/2" and 1" jaw length.
 | Max Opening | Jaw Length | Part No. | Link |
|---|---|---|---|---|
 | 1/2" | 1/2" | SG020 | View Product |
 | 1/2" | 1″ | SG022 | View Product |
 | 3/4" | 1/2″ | SG024 | View Product |
 | 3/4" | 1″ | SG026 | View Product |
 | Activate using Cleco Pliers which work with all sizes of pins & side grip clamps. | View Product | ||
 | Activate using Cleco Pliers which work with all sizes of pins & side grip clamps. | View Product | ||
This guide shows all our available side grip clamp sizes. Check the kit details for what’s included.
Couldn't load pickup availability

Description
A fast and simple way to clamp sheets together for test fitting, welding, drilling, or riveting.
Clecos offer a fast and reliable way to temporarily hold sheet metal parts together during fabrication processes such as test fitting, welding, drilling, and riveting.
In the world of sheet metal construction, there are countless tools available—some are optional, but Clecos are essential. Whether you're shaping a panel, performing a repair, or building from scratch, the ability to consistently test fit components is crucial. Clecos make this process simple by allowing you to repeatedly position and remove panels with precision.
A Cleco is a spring-loaded fastener that fits into a pre-drilled hole, clamping two metal sheets tightly together. It acts like a temporary rivet, holding the material in place while adjustments are made. As you refine your fit, simply remove and reinsert the Cleco to maintain alignment. These fasteners are installed and removed using a dedicated pair of Cleco pliers—handy tools that you'll find yourself using frequently.
Clecos are reusable and come in a variety of sizes, with 1/8" (copper) being the most commonly used in aviation and automotive applications. Here's a quick guide to the common colour codes:
Specifications
| Brand | Cleco |
|---|---|
| Category | Mixed Size Kits |
| SKU | AT80SG-KIT |
| Shipping Weight | 1.7 kg |
| Total Items in Kit | 87 |
| Country of Manufacture | United States |
Directions for Use
A fast and simple way to clamp sheets together for test fitting, welding, drilling, or riveting.
Clecos offer a fast and reliable way to temporarily hold sheet metal parts together during fabrication processes such as test fitting, welding, drilling, and riveting.
In the world of sheet metal construction, there are countless tools available—some are optional, but Clecos are essential. Whether you're shaping a panel, performing a repair, or building from scratch, the ability to consistently test fit components is crucial. Clecos make this process simple by allowing you to repeatedly position and remove panels with precision.
A Cleco is a spring-loaded fastener that fits into a pre-drilled hole, clamping two metal sheets tightly together. It acts like a temporary rivet, holding the material in place while adjustments are made. As you refine your fit, simply remove and reinsert the Cleco to maintain alignment. These fasteners are installed and removed using a dedicated pair of Cleco pliers—handy tools that you'll find yourself using frequently.
Clecos are reusable and come in a variety of sizes, with 1/8" (copper) being the most commonly used in aviation and automotive applications. Here's a quick guide to the common colour codes:
| Brand | Cleco |
|---|---|
| Category | Mixed Size Kits |
| SKU | AT80SG-KIT |
| Shipping Weight | 1.7 kg |
| Total Items in Kit | 87 |
| Country of Manufacture | United States |


